

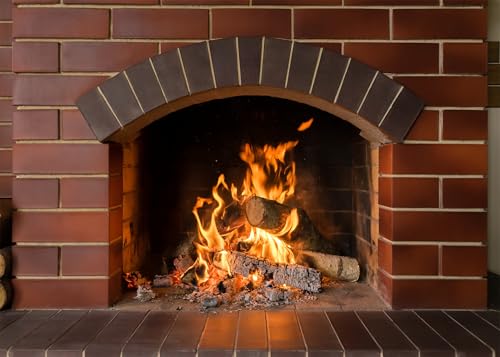
Adding a mantel to an existing hearth is a straightforward project that enhances both the aesthetic appeal and functional utility of your living space. The primary goal is to create a safe, sturdy surface that protects nearby items from heat while providing a designated area for decor. Understanding the specific requirements of your fireplace type is the first step in ensuring a successful installation. This guide explains how to make a mantel for fireplace setups using common materials and safe mounting practices.
Before purchasing wood or hardware, it is essential to measure the opening and verify local building codes. Different fireplace types, such as wood-burning or gas units, have specific clearance requirements that dictate how close a mantel can be placed. Using the wrong material or ignoring these gaps can lead to heat damage or safety hazards. By following a structured approach to measurement and installation, you can achieve a professional-looking result that complements your home’s interior design. The following sections detail the necessary steps and considerations for this project.


Constructing a mantel requires precision in both material selection and installation. The process begins with assessing the fireplace type and measuring the opening to determine the appropriate size and clearance. A well-planned mantel not only adds visual interest but also serves as a protective barrier between the firebox and the surrounding wall. Understanding the structural integrity of the wall is crucial, as it must support the weight of the mantel and any decorative items placed on it.
| Fireplace Type | Typical Clearance (Top) | Material Suitability | Mounting Method |
|---|---|---|---|
| Wood-Burning | 12-18 inches | Hardwood, Stone, Tile | Wall Anchors, Studs |
| Gas | 6-12 inches | Wood, MDF, Stone | Wall Anchors, Studs |
| Electric | 4-6 inches | Wood, MDF, Metal | Wall Anchors, Studs |
The table above provides general guidelines for clearance and material selection based on common fireplace configurations. Always consult the manufacturer’s manual for your specific unit, as requirements can vary. Proper spacing prevents heat from damaging the mantel or causing a fire hazard. These measurements serve as a baseline for planning your project.
- Measure the width of the fireplace opening accurately.
- Check the manufacturer’s manual for required clearances.
- Identify wall studs using a stud finder tool.
- Select materials suitable for the heat exposure level.
- Verify local building codes for fireplace installations.
- Ensure the wall can support the mantel’s weight.
Measuring and Planning the Mantel Size
Accurate measurements are critical to ensuring the mantel fits properly and looks balanced. Start by measuring the width of the fireplace opening from one side to the other. Add a few inches to each side for the overhang, which is typically 4 to 6 inches per side. This overhang provides a wider surface for decoration and helps frame the fireplace. The depth of the mantel shelf should be sufficient to hold decor without obstructing the view of the fire.
Height is another important factor to consider when planning the mantel. The top of the mantel should be positioned at a height that is visually pleasing and functional. A common rule of thumb is to place the mantel 12 to 18 inches above the hearth for wood-burning fireplaces. For gas or electric units, the clearance may be less, but it must still meet safety standards. Use a level to ensure the mantel is perfectly horizontal, as even a slight tilt can look unprofessional and affect stability.
Choosing the Right Materials for Heat Resistance
The material you choose for the mantel depends largely on the type of fireplace and the heat it generates. Wood is a popular choice for its aesthetic appeal, but it must be treated for heat resistance. Hardwoods like oak or maple are more durable and resistant to heat than softwoods. If you are using a wood-burning fireplace, consider using a non-combustible material such as stone, tile, or brick for the mantel. These materials can withstand higher temperatures without warping or catching fire.
For gas or electric fireplaces, wood or MDF (medium-density fiberboard) are often suitable options. MDF is a cost-effective choice that can be painted or stained to match your decor. However, it is less heat-resistant than solid wood, so it is best used with lower-heat sources. Ensure that any wood used is properly sealed with a heat-resistant finish to protect it from heat damage. The choice of material should also consider the overall style of your room and the weight of the mantel.
Preparing the Wall and Identifying Studs
Before installing the mantel, you need to prepare the wall to ensure a secure attachment. Use a stud finder to locate the vertical studs in the wall behind the fireplace. These studs provide the strongest support for mounting the mantel. If the mantel is heavy, it is essential to anchor it directly into the studs rather than just the drywall. Mark the location of the studs on the wall with a pencil for reference during installation.
Clear the area around the fireplace of any debris or obstacles that might interfere with the installation. Ensure the wall surface is clean and dry before attaching the mantel. If the wall is made of brick or stone, you may need to use masonry anchors instead of wood screws. The type of anchor you use should be appropriate for the weight of the mantel and the material of the wall. Proper preparation is key to a safe and durable installation.
Assembling and Mounting the Mantel Structure
Once the wall is prepared, you can begin assembling the mantel structure. If you are building a custom mantel, follow your design plans to cut and assemble the pieces. Use strong wood glue and screws to secure the joints. If you are using a pre-made mantel, follow the manufacturer’s instructions for assembly. Ensure that all parts are aligned and secure before lifting the mantel into place. Having a helper can make this process easier and safer, especially for larger mantels.
Position the mantel on the wall and use a level to ensure it is straight. Mark the screw holes on the wall through the mounting holes in the mantel. Remove the mantel and drill pilot holes at the marked locations. Insert wall anchors if necessary, and then attach the mantel using screws. Tighten the screws securely but avoid over-tightening, which could strip the holes or damage the mantel. Check the stability of the mantel by gently pushing on it to ensure it is firmly attached.
Finishing Touches and Safety Checks
After the mantel is securely mounted, you can add finishing touches to enhance its appearance. Fill any visible screw holes with wood filler and sand them smooth. Apply paint or stain to match your room’s decor. Once the finish is dry, you can begin decorating the mantel with photos, plants, or other items. Keep in mind the clearance requirements and avoid placing flammable items too close to the firebox. Regularly inspect the mantel for any signs of loosening or damage.
Safety should always be a priority when working with fireplaces. Ensure that the mantel does not obstruct the chimney flue or any vents. If you are unsure about any part of the installation, consider consulting a professional. A well-installed mantel not only adds beauty to your home but also ensures safe operation of your fireplace.
By following these steps, you can create a functional and attractive mantel that you will enjoy for years to come. If you are looking for additional ideas, check out our corner fireplace stand guide for related placement tips.
- Fill screw holes with wood filler and sand smooth.
- Apply paint or stain to match room decor.
- Decorate with non-flammable items only.
- Regularly inspect for loose screws or damage.
- Ensure the mantel does not block vents or flues.
- Consult a professional if unsure about installation.
Creating a mantel for your fireplace is a rewarding project that combines functionality with style. By carefully measuring, selecting the right materials, and following safety guidelines, you can achieve a professional result. Always prioritize safety and adhere to local building codes to ensure a secure installation. The final step is to enjoy the enhanced look and feel of your living space with your newly installed mantel.


Write Your Review
No reviews yet. Be the first to share your experience!