

An insert can look like a straightforward fit for an existing opening, but framing decisions depend on what the appliance is and how its manufacturer requires it to be installed. How to build frame for fireplace insert has different answers for an electric unit, a wood-burning insert, and a gas insert. A decorative surround or opening for an electric fireplace is not a substitute for the required support, clearances, or venting of a combustion appliance.
Start by identifying the exact insert and reading its installation manual before cutting or attaching framing. The products listed below illustrate why that matters: an electric insert may be freestanding, recessed, or placed in an existing opening, while a fireplace door is an accessory with model-specific fit requirements, not an insert frame. For related ideas, see our guide to compact fireplace heaters and fireplace cover considerations.
This guide explains how to plan a frame without assuming that one design fits every fireplace. It covers measurements, material and clearance checks, electric-insert framing, and why gas and wood-burning installations need product-specific guidance. If you rent, get the property owner’s approval before altering an opening; local requirements and the appliance instructions still apply.
Top Products


Building a Fireplace Insert Frame: Plan the Opening First
The right frame is the one allowed by the exact appliance manual and suited to the existing fireplace or wall assembly. There isn’t a universal set of dimensions or a single framing recipe for every insert. Before building, identify the appliance, determine whether it is electric or combustion-fueled, and establish whether the work is a decorative surround, a recessed wall opening, or a structural installation.
Identify the insert and what the frame must do
Find the full model name and installation instructions before choosing lumber or laying out studs. The manual should say whether the unit can be recessed, whether it needs a supporting base, how it is secured, and what clearances apply. If the manual is unavailable, contact the manufacturer or a qualified installer rather than treating a similar-looking model as interchangeable.
An electric fireplace insert generally needs an opening or support arrangement that matches its listed installation method, access needs, and electrical connection. A gas or wood-burning insert involves combustion and may depend on a listed venting arrangement, existing fireplace condition, and other product-specific installation details. Those differences make it unsafe to copy an electric fireplace frame plan for a combustion appliance.
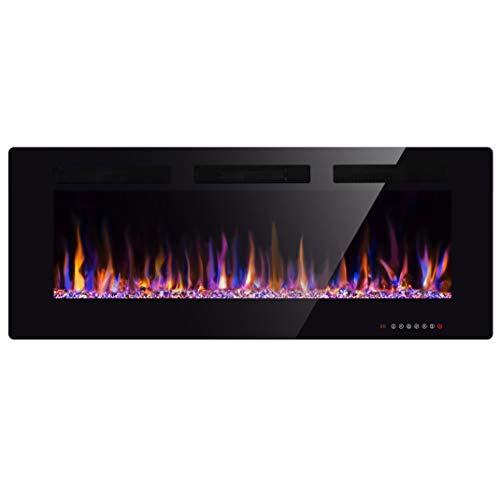
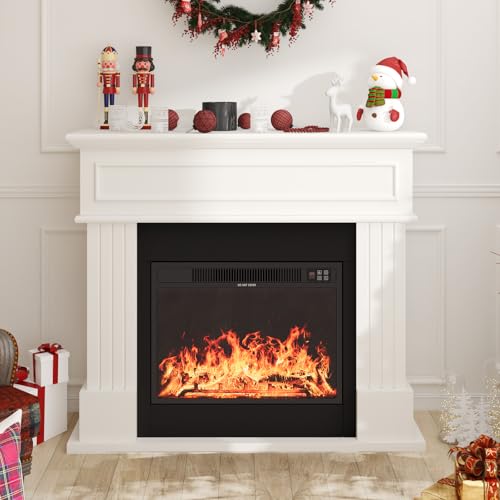
The supplied product descriptions show useful distinctions, not a common framing standard. The LegendFlame Carl 30 Inches with Trim Kit is described as an electric unit that may be freestanding, placed in an opening, or recessed into a wall, and its listed overall dimensions include the trim kit. The Xbeauty 36 inch Electric Fireplace Recessed and Wall is described for recessed, semi-recessed, or wall-mounted installation, with product dimensions of 36 inches wide, 18.11 inches high, and 3.86 inches deep. Confirm the exact model manual and required opening measurements; the listing details alone do not establish a safe frame design.
Measure the opening and account for the finished surface
Measure the existing opening at several points, including its width, height, and depth, because older masonry openings and finished walls may not be perfectly uniform. Record obstructions, such as a projecting hearth, uneven sides, trim, or an outlet that could interfere with the planned installation. Compare those measurements with the dimensions and opening requirements stated in the specific manual, rather than relying on a nominal size in a product name.
For a new wall recess, include the depth of drywall or other finish material in the layout. A frame that measures correctly before finishing can become too small once boards, tile, or trim are added. Also check whether the appliance’s front trim overlaps the opening as intended, and whether the finished face leaves the controls, air outlet, access panels, and plug reachable.
Do not assume that a trim kit hides any size mismatch or makes an undersized opening acceptable. The LegendFlame description gives overall dimensions including its trim kit, while the Xbeauty description gives product dimensions and installation options. Those figures serve different purposes and do not replace the manufacturer’s required rough-opening dimensions, clearances, or support instructions.
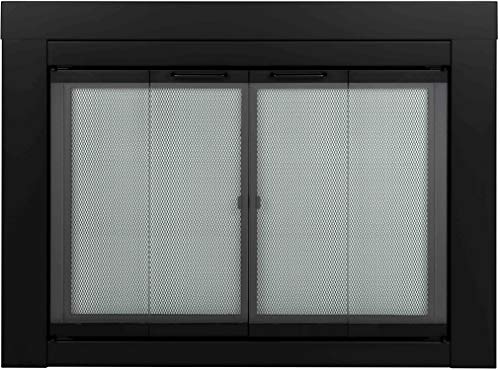
For a fireplace door, measure and identify the fireplace model separately from an insert. The Heatilator Prefab Fireplace Door listing says it is intended only for specified Heatilator models and for an inside fit. That accessory is not a frame for an insert, and its fit information should not be used to size a new opening or identify an insert as compatible.
Plan an electric insert frame around its installation method
First establish whether the electric model is intended to sit in an existing opening, recess into a framed wall, or mount on the wall. These methods place different demands on the frame and can affect access to the appliance and electrical connection. Use only the installation options stated for the exact model, and don’t treat a wall-mounted unit as suitable for recessing just because the cabinet looks shallow.
Lay out the opening from the manual’s required dimensions, then account for framing members and the finished wall. The frame should provide the support and attachment points the instructions specify without pressing against areas that need clearance or blocking ventilation openings. Avoid deciding on a fastener location, support method, or material based on guesswork when the manufacturer has not provided enough information.
Electrical planning belongs in the layout, not as an afterthought. The LegendFlame listing says the unit is a 120-volt plug-in and cannot be hardwired; the Xbeauty listing also describes a 120-volt plug-in connection. Confirm the actual appliance instructions and plan access to the approved connection without pinching a cord, covering an outlet, or placing the connection where it cannot be accessed as required.
Some electric models produce supplemental heat, while flame effects may also be used without heat. The supplied descriptions list heater modes and manufacturer-stated coverage for these models, but those figures are not a guarantee of room comfort or a basis for changing framing clearances. Keep the frame and finish within the model’s stated installation conditions, whether the heater is on or the unit is being used for flame effects alone.
Before closing a new wall, verify the opening dimensions, attachment points, cord route, and access to controls against the manual. A dry fit can reveal whether trim overlaps evenly and whether the appliance can be inserted and removed as intended, but it does not confirm electrical safety or code compliance. If the layout requires altered wiring or the manual’s requirements are unclear, pause and get qualified guidance.
Combustion inserts need a different installation assessment
A gas or wood-burning insert is not simply an electric unit inside a framed box. Combustion appliances can have specific requirements for the existing fireplace, venting, clearances, surrounding materials, and installation method. Which requirements apply depends on the appliance, the home, and local rules, so a generic DIY frame plan cannot establish that the installation is suitable.
Before altering a masonry or factory-built fireplace, identify its make and model where possible, and gather the insert’s exact documentation. Ask a qualified fireplace professional to assess the existing fireplace and proposed installation when the appliance instructions call for it or when the condition and compatibility are uncertain. A frame that appears sturdy does not verify that a venting arrangement, fireplace, or hearth is appropriate for the insert.
Do not cover or modify a vent, flue, access opening, or existing fireplace component to make a frame fit. Do not infer required clearances from another product or from a general diagram. Local permitting and building requirements can differ, so check with the relevant local authority and follow the appliance manual and applicable requirements before work begins.
Some homeowners compare insert options while deciding what will fit an existing fireplace. Our fireplace heater overview offers related context for supplemental electric heat, but a heater roundup cannot determine whether a combustion insert or a particular frame is compatible with a home. Compatibility requires product-specific documentation and, where needed, an on-site assessment.
Build and finish only after the layout is verified
Once the appliance manual and site conditions establish the permitted framing approach, mark the opening and check that it is square and level. Assemble the frame using the support and attachment method specified for the project; don’t invent structural details where the appliance instructions or wall conditions leave questions. The appropriate materials and fastening method depend on the installation and surrounding construction.
Keep the appliance’s required clearances and service access in view as the frame takes shape. A decorative finish should not cover required ventilation openings, trap heat where the manual prohibits it, or prevent removal for service. If the plan includes combustible finish materials near a combustion appliance, use the product’s instructions and qualified guidance to determine what is allowed.
Before attaching permanent finish, compare the framed opening with the final appliance dimensions and installation instructions again. Check that the insert can be positioned without forcing it and that trim, controls, air outlets, and electrical access remain usable. Stop if the dimensions differ from the manual or if the frame requires the appliance to be altered.
After finishing, follow the appliance manual for placement, attachment, connection, and initial operation. Do not use the frame as a reason to bypass a guard, control, or other safety feature. For combustion units, have required installation and venting work handled and checked according to the product instructions and applicable local requirements.
Why a frame may not fit, and when to stop
A common planning error is mixing up product dimensions, rough-opening dimensions, and dimensions that include trim. Another is assuming that a listed installation option applies to every version of a brand’s fireplace. Check the complete model identifier and the manual, then resolve discrepancies with the manufacturer before cutting or fastening the frame.
An opening may also be out of square, too shallow, or obstructed by an outlet, hearth, or existing component. Don’t force the appliance into a tight space or remove a fireplace part simply to make the face sit flush. Recheck the measurements and determine whether the obstacle is permitted to be changed; for uncertain structural or combustion-related conditions, seek qualified assessment.
Stop work if you find signs of damage, unexplained smoke or odors from a combustion fireplace, a blocked or altered venting route, or instructions that conflict with what is present in the home. Those conditions need assessment rather than concealment behind new framing. If a renter or other occupant is involved, obtain the owner’s approval for structural changes and comply with the property’s rules.
Frame selection can also affect future maintenance. A design that permanently buries a plug, access panel, fastener, or service point may make ordinary service difficult or conflict with the installation instructions. Plan for the unit to be inspected, disconnected, or removed as the manufacturer directs, instead of treating a finished surround as a reason to seal every gap.
Keep the completed installation usable and documented
Keep the product manual, model identification, and any installation records accessible after the frame is finished. Those details help answer later questions about operation, replacement parts, and service. If the insert or its controls behave differently from the manual’s description, avoid opening the appliance or changing wiring as a first response.
For electric units, keep the intended plug and control access available, and follow the manufacturer’s directions for cleaning and use. The supplied descriptions include remote controls and independent heat and flame controls for some models, but those features do not establish that every unit has the same service needs. If a cord, plug, control, or enclosure appears damaged, stop using the appliance and contact the manufacturer or a qualified service provider.
Combustion appliances require their own operating and maintenance instructions, including any inspection or service directions provided by the manufacturer. Do not assume that a new frame resolves an existing fireplace or venting concern. If performance changes, smoke enters the room, or the appliance shows damage, stop and seek qualified assessment rather than attempting an unverified repair.
The practical rule is simple: establish the exact appliance and its permitted installation method before building around it. For an electric insert, the manual’s opening, support, access, and electrical directions govern the frame. For gas or wood-burning equipment, have compatibility, clearances, venting, and local requirements addressed before construction, then keep the finished installation accessible and consistent with the product instructions.




Write Your Review
No reviews yet. Be the first to share your experience!